
Set Up Headless Raspberry Pi Using MacOS
May 07, 2021
Blog
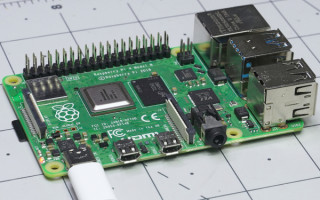
While the Raspberry Pi works extremely well in a “headless” mode without a monitor, setting this up can be a little tricky. In this article we’ll go over how to do so specifically under macOS, allowing you to get your RPi remote computing node up and running without using an external monitor whatsoever.

Will it work? Yes it does. (Image Credit: Jeremy Cook)
Software Needed
First, we’ll need the following software packages to get things going:
-
Download your preferred version of Raspberry Pi OS from this page, likely Raspberry Pi OS Lite if you don’t need a GUI. Right-click and open to extract the .img file inside the .zip archive to somewhere that you can find it.
- BalenaEtcher, used for burning the RPi OS disk image, is available here for macOS (along with Windows and Linux if needed in the future) macOS’ built-in TextEdit tool works well for creating the ssh and wpa_supplicant.conf files that are needed to connect over WiFi. There are a few tweaks that will save you some hassle.
- Scanning program, such as Angry IP Scanner to determine the Pi’s IP address and if the Pi has logged onto the network.
Setup Configuration Files
First open up TextEdit to create your configuration files. Under New Document, under the Format area, select Plain text instead of Rich text. Under Open and Save in the When Saving a File: area, uncheck Add “.txt” extension to plain text files.
Save a blank file as ssh without anything in it. The default (UTF-8) works without issue for this and the actual configuration file. You can then open up a new file, and add your network configuration data, which will look something like this:

(Image Credit: Screencap)
There’s also an example on raspberrypi.org that may be helpful for configuring things for your particular network setup.
Once you have these two files setup properly, I’d suggest saving them somewhere where you can find them later. You can then use them to setup new Pis on the same network without going through any text editing whatsoever. I elaborate on this a little further here, which should work well, no matter what OS you’re using for setup.
Burn Baby, Burn!

There it is! (Image Credit: Screencap)
Plug in your SD card into a reader, fire up balenaEtcher, and select the correct drive and file to burn. If you’re unsure if you’ve selected the correct drive, you can always pull the card to make sure it disappears. Not a bad idea to ensure you don’t overwrite important data.
Once done, pull the SD card, then plug it in again, and you’ll see a boot partition pop up on your desktop. Copy the ssh and wpa_supplicant.conf files to this partition, right-click on boot and eject the drive, then pull the card and place it in your (unpowered) Raspberry Pi.
Signs of Life?

There it is! (Image Credit: Screencap)
Power the Pi up, and give it some time to go through it’s initial setup. Then fire up Angry IP Scanner to see where it pops up. As outlined in this Raspberry Pi Connect with Macintosh article, you can then log on via SSH with the built-in macOS terminal, which is a pretty neat feature. You’ll want to change the default password from “raspberry” to something else to avoid unnecessary security issues.
If it doesn’t come up, check your wpa_supplicant.conf file to make sure there’s not a typo somewhere. If you need to make a correction, just plug in the SD card, copy your wpa_supplicant.conf and ssh files over, and try again on the Pi.
Ask me how I know. Another reason to save your files once they’re working correctly!
Jeremy Cook is a freelance tech journalist and engineering consultant with over 10 years of factory automation experience. An avid maker and experimenter, you can follow him on Twitter, or see his electromechanical exploits on the Jeremy Cook YouTube Channel!


