
Interfacing IoT with embedded using Node.js, part 2: GPIO
September 13, 2017
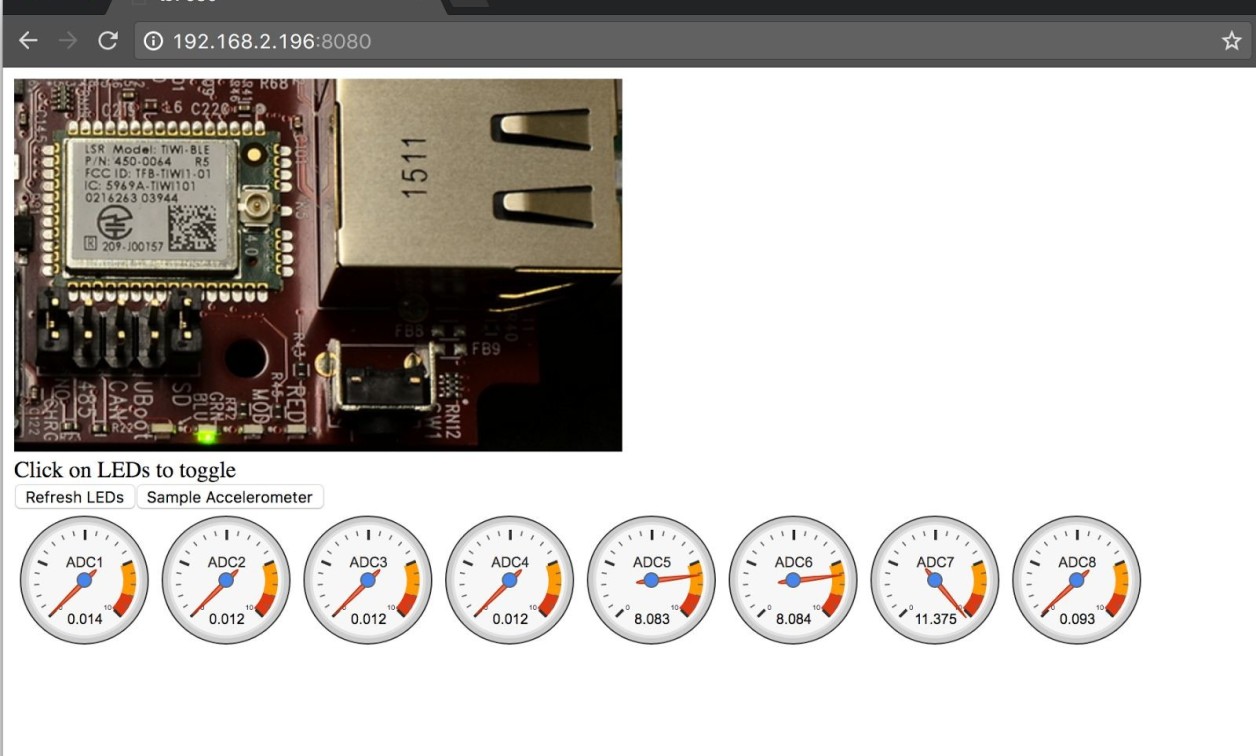
In "Interfacing IoT with embedded using Node.js, part 1," we introduced the npm package ts7680-demo-server. We will continue to examine this package in the next three installments, after which we tie it all together with a web page that provides a user interface for controlling a Technologic Systems TS-7680 board.
Let's look at how we implement GPIO support.
The TS-7680 uses the standard sysfs interface for controlling GPIOs, so the package to support GPIO will work on any board using the sysfs interface.
To control a GPIO we must first write the GPIO number to /sys/class/gpio/export, and then read and write the direction (valid values being “in” for an input and “out” for an output) with the file /sys/class/gpio/gpio#/direction. We also read and write the value of the GPIO with the file /sys/class/gpio/gpio#/direction, where valid values are “high” and “low.”
Now let’s look at the implementation in gpio.js. First we need require the “fs” module, as we will be interacting with sysfs files in the filesystem to control our GPIOs:
var fs = require("fs")
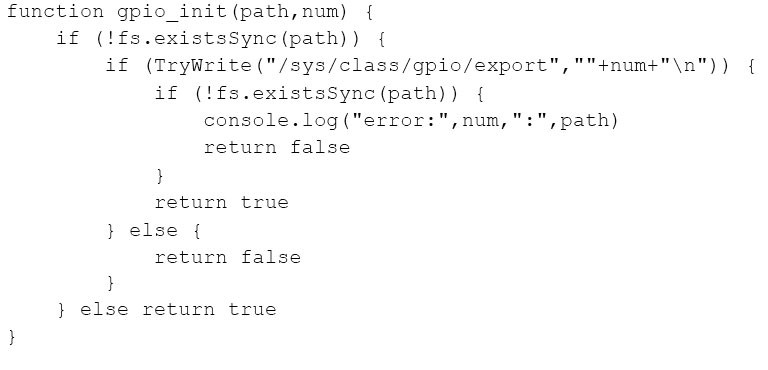
Before doing anything else, let’s implement a function to make sure the GPIO initialization has been performed prior to actually accessing the sysfs file that controls the GPIO. It’s fairly simple. Just try to write the GPIO number to the export file and return a Boolean that indicates whether or not it succeeded:
Now let’s look at the TryWrite function. When we write to the sysfs files we will write a single string that will command the kernel in some way. This function opens the specified file and writes the string. As the writes are very small and interact with the kernel without touching any storage media, we use synchronous writes. Any errors that occur will throw an exception, which we will catch to determine whether to return success (true) or not (false).

Now we are ready to actually read or write the GPIO. The gpio_get function will take the GPIO number to read and return a string indicating the current state of the GPIO. If the GPIO is an input, the value returned will either be “INPUT_HIGH” or “INPUT_LOW;” if the GPIO is being actively driven as an output, the value returned will be either “HIGH” or “LOW.” It’s also possible to return “ERROR” if something goes wrong.
Let’s look at what to do step by step. First, we get the path to the GPIO file based on the GPIO number passed:

After this we make sure the GPIO is initialized in sysfs and returns an error if this does not succeed. For instance, an invalid value might be passed:
if (!gpio_init(path,num)) return "ERROR"
Then we can get the direction of the GPIO by reading the direction file relative to our GPIO path. This will be either “OUT” for an output, or “IN” for an input:
var dir=fs.readFileSync(path+"/direction", "utf8")
Next, we get the value of the GPIO by reading the value file. This will be a “1” or a “0,” which will be converted into a number:
var data=Number(fs.readFileSync(path+"/value", "utf8"))
Finally, we convert the direction/value pair into the corresponding string, which is returned to the caller:

Writing to a GPIO
Below is the function for writing to a GPIO, gpio_set. Just as in gpio_get, we retrieve the base path based on the GPIO number and make sure the GPIO is initialized:

Now we translate the value passed (which is either “INPUT,” “HIGH,” or “LOW”) into a command to send to the direction register:

All that is left is to write the command and return success or failure to the caller:

Processing the HTTP request
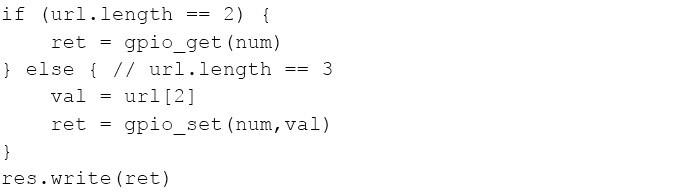
At this point we are ready to write the function to process our HTTP request to perform the requested function. First, we split the URL into components. The first component will be the base URL (e.g. “gpio”); if there are two components we will get the specified GPIO value(s); if there are three components we will set the specified GPIO(s) to the specified value. If there are any different number of components, an invalid request was made and we an error will be returned:

The next thing we do is split our GPIO number into an array. We do this using the comma character, which allows multiple GPIOs to be specified as a comma delimited list. If no commas are present, only one GPIO is specified and an array with a single element will be returned:
var numlist = url[1].split(",")
Now we are ready to start sending our reply. Since a JSON string is being sent, go ahead and write out the opening array character:
res.write("[")
Next we set up a loop over all the GPIO numbers in the request:
for (i=0;i
Since we are writing a JSON array, a comma needs to be sent between each element. We do this by writing the comma at the start of each element if there was a preceding element:
if (i>0) res.write(",")
Now we convert the GPIO number to an integer and do some error checking:

Next, we look at the number of arguments to decide whether to get GPIO info or set it. We store the return string and the write it to our output:
When our loop is done, we close the JSON array and finish sending to the client:

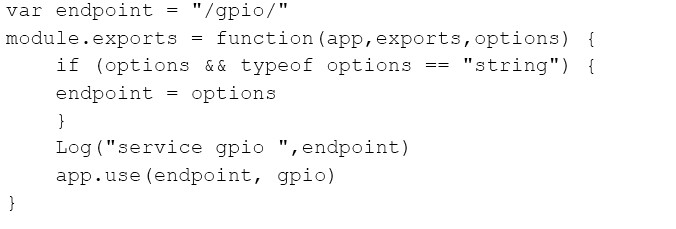
Finally there is our module.exports function. We process any options and set up our endpoint to be connected to our gpio function:
The next installment will look at supporting the accelerometer.
Technologic Systems
LinkedIn: www.linkedin.com/company/technologic-systems
Facebook: www.facebook.com/embeddedARM
Google+: https://plus.google.com/+Embeddedarm-TS
YouTube: www.youtube.com/user/embeddedarm
GitHub: https://github.com/embeddedarm


